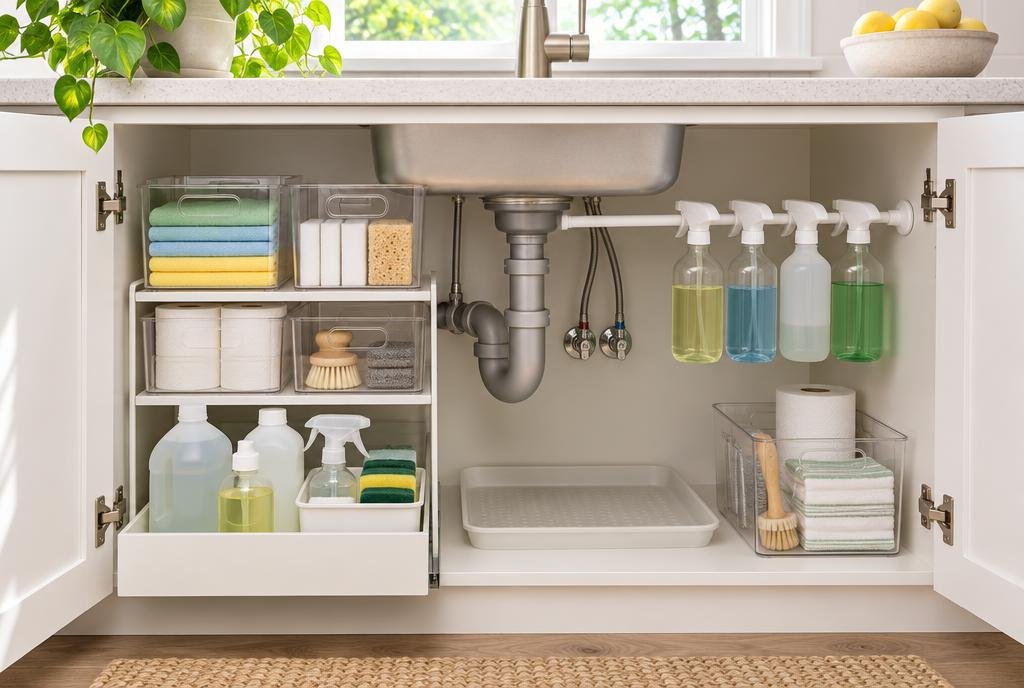
The cabinet under the kitchen sink is the junk drawer of the whole house, just bigger and damper. It’s where half-empty spray bottles go to hide, where the extra sponges multiply and where a slow drip can quietly soak through the cabinet floor for months before anyone notices.
The fix isn’t buying a stack of bins and hoping for the best. It’s a short process: clear it out, check for problems, plan around the pipes, and set up a few simple zones. Along the way, you’ll make sure the two things that matter most in an emergency, your shutoff valves and a clear path to them, never get buried again.
Step 1: Empty everything and look for trouble
Pull every single item out. It’s the only way to see the cabinet floor and the plumbing clearly, and it’s where most of the useful discoveries happen.
What to check while it’s empty
- Water stains, swelling or soft spots on the cabinet floor. Particleboard bubbles and crumbles when it gets wet repeatedly.
- Drips at the joints of the drain trap, the dishwasher hose and the supply lines. Run the faucet for a minute and run a paper towel along each connection. A damp towel tells you more than your eyes will.
- A musty smell. That usually means moisture has been sitting somewhere for a while.
- Signs of pests, like droppings or chewed packaging. Under-sink cabinets offer water and hiding spots, which is exactly what pests look for.
If you find a leak, fix it before you organize anything. A loose slip nut on the trap can often be hand-tightened, but a leaking supply line or a cracked fitting is a job for a replacement part or a plumber.
Find your shutoff valves
Most kitchen sinks have two small shutoff valves on the supply lines, one for hot and one for cold. They’re the fastest way to stop water if a faucet or hose fails. While the cabinet is empty, find them, and gently test that you can turn them. Many homeowners don’t learn where these are until water is already spraying across the floor.
Tip: Whatever system you build, leave a clear line from the cabinet door to both shutoff valves. If you have to move three bins to reach them in an emergency, the system isn’t finished yet.
Step 2: Purge before you plan
You’ll almost certainly find duplicates and products you don’t use. Sort everything into three piles:
- Keep: things you use at least every few weeks at the sink.
- Relocate: things that belong somewhere else, such as backup paper towels, laundry products, light bulbs or tools.
- Toss or dispose: empty bottles, dried-out sponges, products you’ve replaced and anything with a damaged label.
For old cleaners and chemicals, check the label for disposal directions, and look up your town’s household hazardous waste program. Don’t pour them down the sink or a storm drain.
This is also a good moment to retire a few products altogether. If you’ve been using vinegar on stone countertops or your dishwasher’s rubber parts, our list of things you should stop cleaning with vinegar may free up even more space.
Step 3: Measure around the pipes
The plumbing is what makes this cabinet so awkward. The drain trap usually drops right down the middle, splitting the space into two narrow towers with a low zone in front.
Take three measurements
- Total interior width and depth, measured at the cabinet floor.
- Height under the trap, from the floor to the lowest point of the drain pipe.
- Width of each side from the cabinet wall to the nearest pipe, plus the clearance needed for the cabinet door hinges.
Write these down and take them shopping. Most under-sink organizer disappointments come from buying something that’s an inch too tall to clear the trap or too wide to fit past the hinge.
Step 4: Set up zones that match how you actually use the sink
Organization only lasts when the things you reach for most are the easiest to grab. Think in zones, not containers.
Front and center: daily items
Dish soap refills, dishwasher detergent, a sponge or brush and a small trash bag stash belong right at the front, where you can grab them without kneeling. A shallow caddy with a handle works well because you can pull it out as one unit.
The sides: tall bottles and vertical storage
The narrow spaces beside the pipes are perfect for tall items. Two ideas that work in almost any sink cabinet:
- A tension rod mounted high across one side, with spray bottles hanging by their triggers. This frees the entire floor below it.
- Narrow pull-out drawers or stacking bins sized to the measurements you took. Pull-outs are especially helpful in deep cabinets, where items in the back are otherwise forgotten.
The cabinet doors: lightweight extras
Adhesive or over-the-door racks can hold sponges, rubber gloves or a roll of trash bags. Keep it light, and check that whatever you mount doesn’t hit the pipes when the door closes.
The back: backstock
Extra sponges and refill bottles can live in a labeled bin at the back. Since you only reach there occasionally, that’s where the less convenient space belongs.
Step 5: Make it safe, especially if kids or pets are around
Here’s the “I didn’t know that” part for a lot of families: poison control centers and child-safety organizations specifically recommend not storing cleaning products under the sink when young children are in the home. At toddler height, that cabinet is eye level and easy to open.
Safer storage rules worth following
- Move the most hazardous products, such as drain openers, oven cleaners and dishwasher detergent pods, up high or into a locked cabinet.
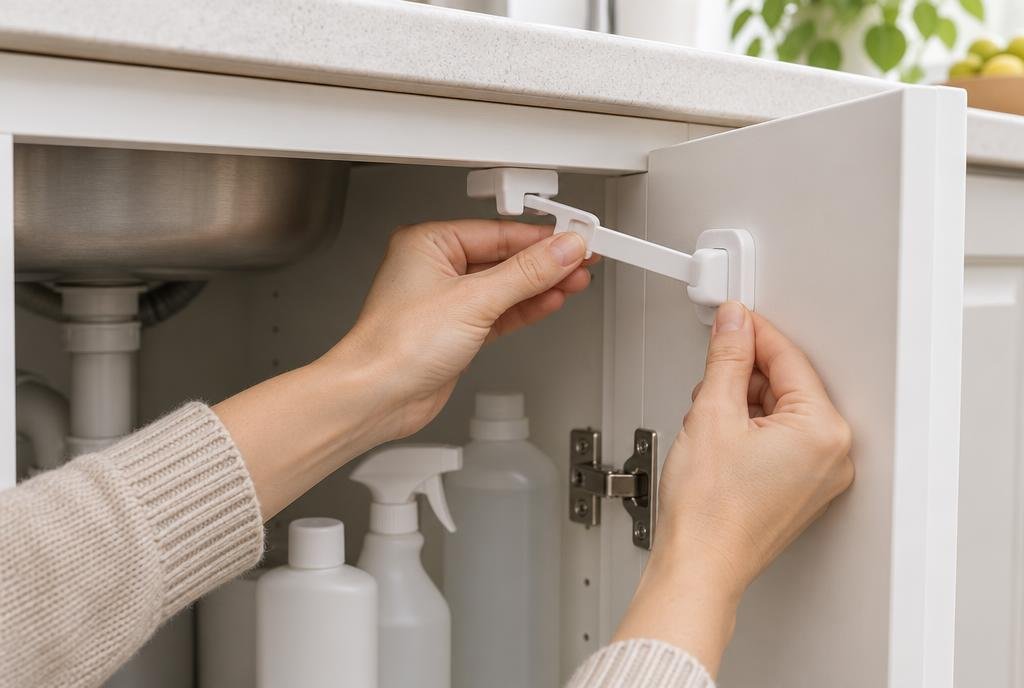
- If anything has to stay under the sink, install a child safety latch that locks every time the door closes.
- Always keep cleaners in their original containers with the labels intact. Never pour a product into an old food or drink container, which a child can easily mistake for something safe to drink.
- Keep cleaning products separate from food. The under-sink cabinet is not a pantry overflow space.
- Save the Poison Help line, 1-800-222-1222, in your phone and post it somewhere visible.
- Never combine different cleaners in one bottle. Some mixtures release dangerous gases.
Step 6: Protect the cabinet from future leaks
Once everything is organized, add a little insurance so the next drip doesn’t ruin your work.
- Line the floor with a waterproof under-sink mat or a rimmed tray. A raised edge holds small spills instead of letting them seep into the wood.
- Add a battery-powered water leak alarm on the cabinet floor. These inexpensive sensors beep when they get wet, which can turn a ruined cabinet into a towel-and-tighten job.
- Keep paper goods and cardboard out. They absorb moisture, hide leaks and can attract pests.
- Use clear bins where you can, so you’ll spot a puddle or a leaking bottle quickly.
Keeping the drain itself healthy helps too. If it’s slow, see our guide on unclogging a drain without harsh chemicals, which also means fewer caustic products to store in the first place.
Under-sink organization checklist
| Task | Why it matters |
|---|---|
| Empty the cabinet completely | Reveals leaks, damage and duplicates |
| Check every joint with a paper towel | Finds slow drips you can’t see |
| Locate and test both shutoff valves | Lets you stop water fast in an emergency |
| Purge and dispose of old chemicals properly | Frees space and reduces hazards |
| Measure width, depth and trap height | Prevents buying organizers that don’t fit |
| Set up daily, side, door and backstock zones | Keeps the system easy to maintain |
| Add a latch or move hazardous products up high | Protects children and pets |
| Line the floor and add a leak alarm | Catches the next drip early |
Keep it organized with a 5-minute monthly reset
Once a month, pull out the front caddy, wipe the mat, toss empties and run a quick paper-towel check along the plumbing joints. Pair it with another monthly kitchen job, like cleaning your dishwasher filter, and it becomes a habit rather than a project.
Frequently asked questions
What should you not store under the kitchen sink?
Avoid storing food, pet food, paper goods and cardboard there, since moisture and pests are common under sinks. If young children live in or visit your home, keep hazardous cleaners like drain openers, oven cleaners and detergent pods out of that cabinet entirely, or behind a reliable lock.
What’s the best organizer for under a sink with pipes in the middle?
Expandable shelves made to fit around plumbing, narrow pull-out drawers on each side and a tension rod for spray bottles tend to work best. The right choice depends on your measurements, so check the height under the trap before you buy anything.
How do I keep the cabinet under my sink from getting moldy?
Fix any leaks first, then keep the cabinet floor dry with a waterproof mat, avoid storing damp sponges and rags in closed containers, and leave enough space for air to move. A leak alarm helps you catch new drips before moisture has time to build up.
